

Before
After a couple of weeks of off and on work I'm finally ready to reveal my DIY Coffee Table Makeover. When we were first married my husband came home proudly exclaiming that our neighbors had given us a coffee table for free. Now you can't do better than free but it was this lovely orange laminate table. Needless to say it wasn't my favorite piece of furniture. For years I thought about a diy coffee table makeover but I didn't know if painting laminate furniture would be worth the time and effort.
*Enter Pinterest*
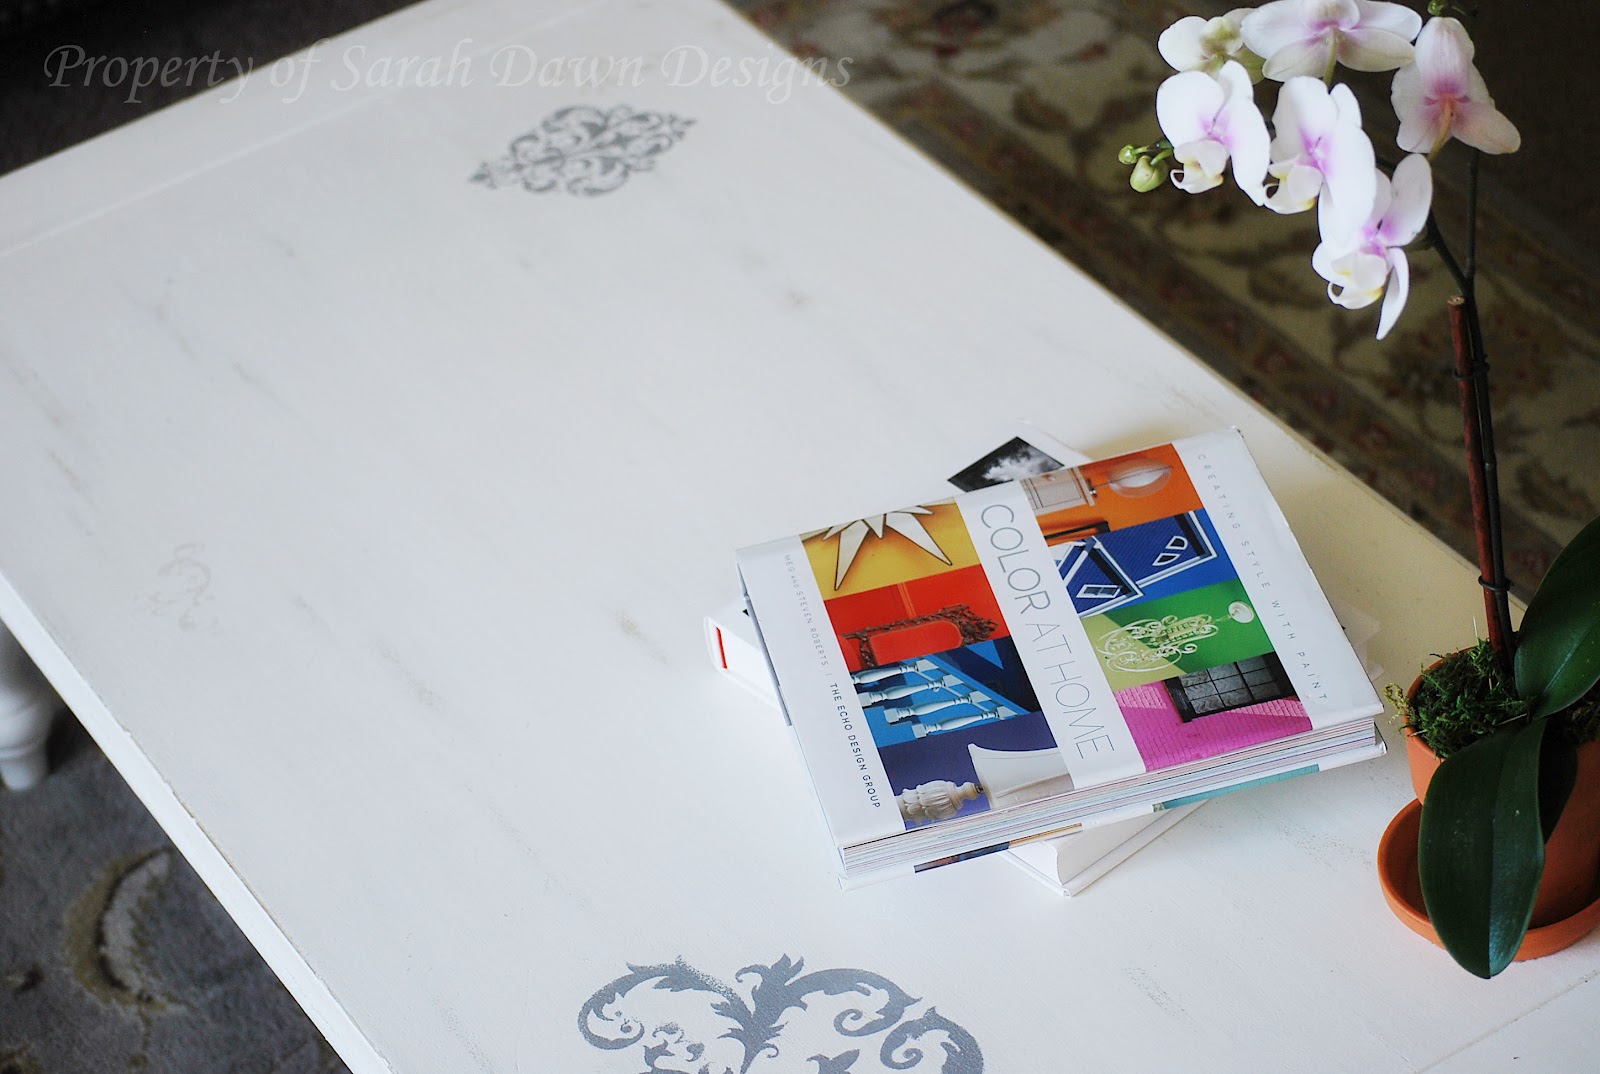
I found a primer on Pinterest that you can paint right onto laminate furniture. It claims to stick to any surface. You can then use any paint on top of the primer. This gem sealed the deal and I got to work: thinking, creating, and lots of sanding. Here is the finished result.

After
Here is a list of supplies I used for this diy coffee table:
- 1 quart Zinsser primer (I had it tinted to match the light brown seen in the distressing)
- 1 sample size Behr paint in Distant Tan PWL-83
- 1 quart Behr pain in Swiss Coffee 1812 (Satin Enamel Finish)
- 8 oz can of Minwax Polycrylic Protective Finish (using a 50% coupon at Michaels)
- 2 oz bottle of a metalic acrylic paint
- 2 oz bottle of a pearlized white acrylic paint
- 3 different damask stencils (Hobby Lobby)
- paint roller
- small paint brush (decent quality)
- sandpaper
Step 1: Make sure the surface of the table is smooth. I had to sand down a paint ring from another project. Then apply 1 coat of the Zinsser Primer. As you read from above I had it tinted to match the Distant Tan. You don't have to do this if you don't want. Let it cure for at least an hour or two before painting on top of it.
Step 2: Paint one coat of the Distant Tan. Let it cure for 4-5 hours.
Step 3: Paint two coats of the Swiss Coffee. You won't use the entire quart but know that the properties between a sample size and the actual base they use for the quart are different enough that I didn't want to take any chances on my top coat. They bond a little bit differently and of course the finish is not the same. Let each coat dry for at least 4-5 hours before applying the next one.
Step 4: Sand, Sand, Sand. It may use muscles you didn't know you have but it is worth it. As you can see in the photos in some areas I sanded down to the Distant Tan layer to give it the antique look. However, you will want to sand at least the entire table top to even out the texture of the paint, otherwise you will really be able to see where you distressed the table.
Step 5: When your coffee table is distressed and sanded to your liking stencil on your design. I just used the craft acrylic paint so it didn't take very long to dry.
Step 6: Apply 1 coat of the protective finish. Let it dry for at least 2 hours. Sand this coat to try and hide some of the brush strokes. Repeat this process with 1 or 2 more additional coats.
TA DA! You've created a beautiful piece of furniture.
*You may want to know that for paint to be completely cured it will take at least 21 days so be careful when you move it back into the house.*

Did you notice the almost secret stencil design on this DIY coffee table? I love that the pearlized stencil appears in some lights and disappears in others. It gives the table a little bit of mystery.
It really lightens up our living room and is a one of a kind piece, something of my own doing. I couldn't be happier with the outcome.
Have you ever attempted painting laminate furniture? How did it turn out?
Love it! Great job! As for laminated furniture, Krylon Fusion spray paint sticks to just about anything!
ReplyDeleteWas really keen to see how you went with this as I've painted some pre-loved coffee tables and they turned out kinda ok, but love what you have done the stencils finish it off. Great job and TFS
ReplyDeleteSo impressed! Lovely redo. Thank you for sharing. Visiting from Bear Rabbit Bear. Would love it if you would share this at my Make it Pretty Monday party at The Dedicated House. http://thededicatedhouse.blogspot.com/2012/07/make-it-pretty-monday-week-4.html Wishing you a grand evening. Toodles, Kathryn @TheDedicatedHouse
ReplyDeleteThat turned out Great! I have a few furniture pieces that are in need of a makeover as well.
ReplyDeleteI would love to try painting some laminate furniture, but I haven't yet. So glad to see that it really can be done! Great job!!!
ReplyDeletegoing to have to try this! Looks great! Love the little design on it.
ReplyDeleteGood idea!
ReplyDeleteHow nice.. I love the cute design on the sides.. Thanks for linking up at friday fun party.. Have a nice weekend!
ReplyDeleteWell done!
ReplyDeleteThank you for sharing this at my Make it Pretty Monday party at The Dedicated House. Hope to see you next Monday. Toodles, Kathryn @TheDedicatedHouse
ReplyDeleteVery nice makeover! Such a cute stencil. Thanks for visiting FFL,
ReplyDeleteLina
This is so creative! I love it! Thank you so much for contributing this to the link party at mommy's sweet confessions! See you at the next one!
ReplyDelete