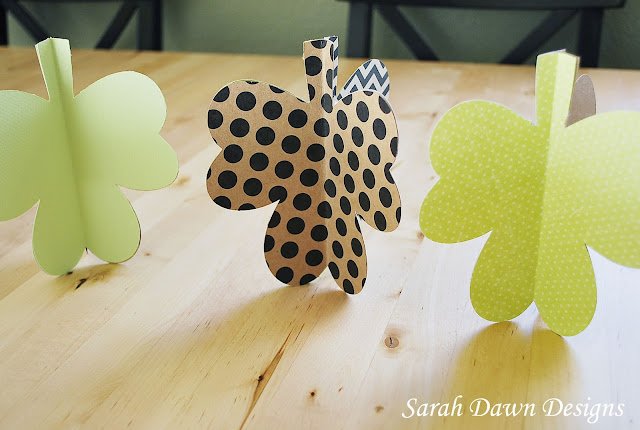
Before I get started on this easy St. Patrick's Day craft I thought I would share something I learned this last week from one of you. As some may or may not know I will link up my posts to various link parties and many of them have a limit to how many characters you can use in the title. Like Twitter, you learn how to shorten your message for link parties. For example, instead of "St. Patrick's Day Printable," I was linking up, "St. Patty's Day Printable" or "St. Patty's Printable." Seems normal right?
That's what my American self thought until someone commented on my post and politely informed me that it is St. Paddy and NOT St. Patty.
At first I was a little confused so I Googled, "St. Patty vs St. Paddy." Sure enough folks the correct term is St. Paddy. It drives the Irish nuts when we Americans get it wrong. Often times they refer to the holiday just as Paddy's Day. So, I learned something new this week.
As for this St. Patrick's Day Craft, these 3-D Paper Shamrocks are super easy to make. You might have guessed I was giddy with excitement as I selected the papers for this project. I will take any chance I can get to mix patterns and colors.
Supplies Needed:
- Paper (each clover has three sides)
- Really Good Double Stick Tape
- Silhouette Machine/Electronic Paper Cutter (or you can cut them by hand)
The steps are quite simple.
1.) Cut out the shamrocks with your Silhouette machine. I opted for the electronic cutter vs cutting them by hand so that they would line up perfectly and because it was easier. For three 3-D clovers I needed 9 paper shamrocks.

2.) Fold each Shamrock in half right side out meaning you want the the side that will be seen to be in the center when folded.
3.) Place the double stick tape on the back of your shamrocks. As noted in the top, each shamrock has three sides, so I attached three different shamrocks together to make one 3-D shamrock.
That's it!
The fun part of this St. Patrick's Day Craft is that I can change the paper shamrocks around to get different mixes of patterns throughout the next few weeks. I can also arrange them in an assortment of ways; some up, some down, some on their sides, all upside down, etc.
We don't do a lot for St. Patrick's Day around here so I love that this project took minimal time and money but still adds a little festivity to the air. Happy Paddy's Day!


Super cute! I love the polka dot one!
ReplyDelete-Ana from www.babbledabbledo.com
Oh these are fun!
ReplyDeleteCute! Thanks for sharing. I'd love for you to check out our Pattern Party. Only those with free patterns to share are invited to link up.
ReplyDeletehttp://getyourcraptogether.blogspot.com/search/label/Pattern%20Party
These are the most delightful shamrocks I've ever seen! Too cute!
ReplyDeleteThese are really fresh and fun! Thanks for sharing them at the Power of Pinterest party :) I'll be featuring them on the blog today.
ReplyDeleteTheses are so fun! Thanks for sharing at Fluster's Creative Muster. I'm looking forward to seeing what you link up next week.
ReplyDeleteThese are really CUTE !!
ReplyDeleteI love these! I'm cohosting Mom's library this week and I featured your 3D shamrocks.
ReplyDeletehttp://www.ready-set-read.com/2013/03/st-patricks-day-activities-for-kids-and.html
Thanks for linking up to Mom's library last week.
These are really cute designs and pretty easy to make. Thanks for sharing it, will definitely going to try it out
ReplyDelete